Important notice: Pocket connection is now officialy available in their integrations page
– https://docs.omnivore.app/using/importing.html#importing-data-from-pocket
Nevertheless, you can read our code if you want to learn about web information processing
I tried to use Pocket, I really tried, but I had to stop using it because it only allowed you 3 highlights per post for free. I know that Pocket is just a company and that they are just trying to provide value to its shareholders, but, come on, is that really a PREMIUM feature? Are you really trying to charge me for a couple of extra bytes?
That’s why I decided to search for another read-it-later app, and I came across Omnivore. It is also Open Source, which would let me self-host the application if I wanted to. I’d be more than happy to pay a fair price for a service I like, but in this case, it isn’t necessary because it’s completely free.
But first, I needed to migrate my data from Pocket to Omnivore. There is currently an open Issue in GitHub (#2050) to provide an official Pocket integration, check in that thread if it has been already implemented before continuing in this tutorial. In my case, after waiting a few weeks, I decided to get on my knees and implement it myself, learning a bit of GraphQL on the way.
Exporting your data from Pocket
This was by far the easiest part, just visit getpocket.com/export and download the ril_export.html file.
Uploading your data to Omnivore
I created a Jupyter Notebook to parse the ril_export.html file and make the proper GraphQL queries to Omnivore’s API.
This notebook doesn’t just create the article, it also archives it if it has been read in Pocket, and sets the upload date.
Getting an Omnivore API key
Because we are using a custom-made application, you will need a key to interact with Omnivore. You can find info on how to create an Omnivore API key in the official documentation.
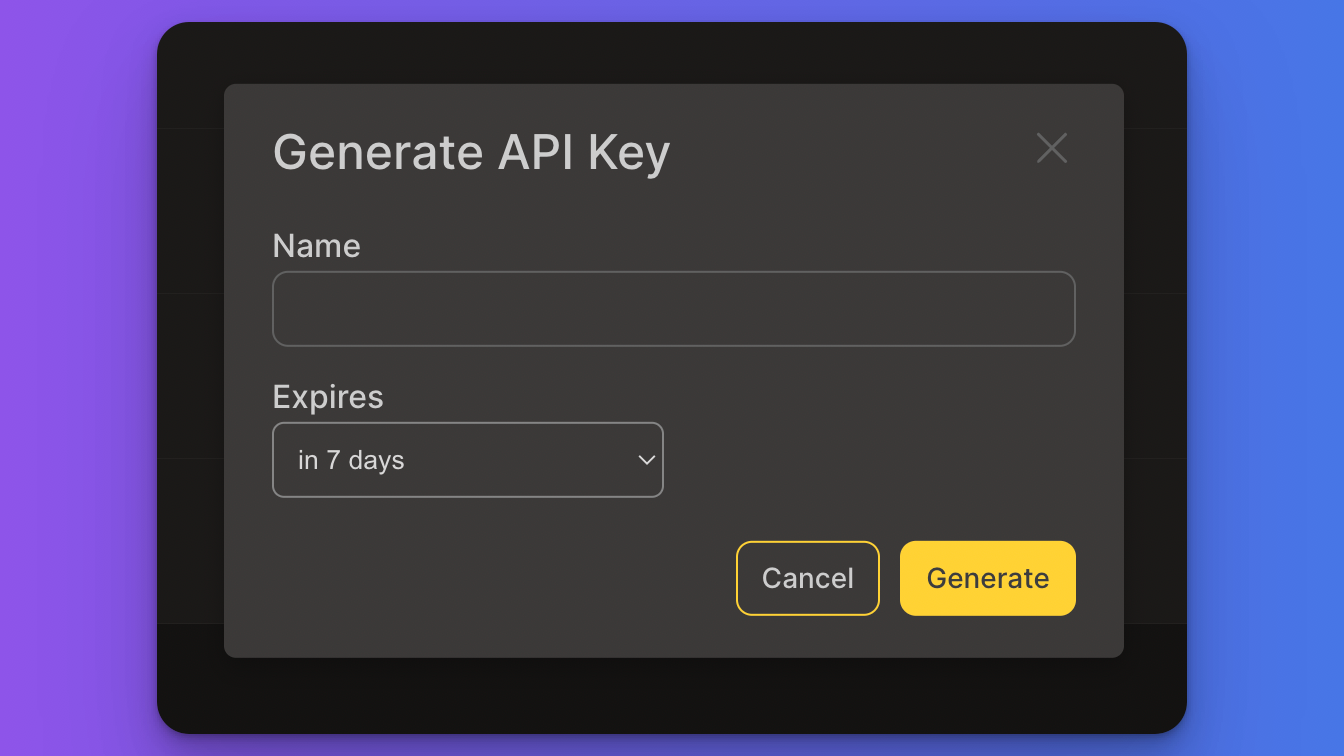
Keep in mind that this API key will be hidden, so make sure to copy it somewhere and don’t lose it, as we will need it in the next step.
If you lose it, don’t worry though, you can always create a new one and delete the unused one.
Running the Jupyter Notebook
I made a Jupyter Notebook using Beautiful Soup to process the ril_export.html file, and gql to run the GraphQL queries, as simple as it is. You can run it online on Binder.
You can also download the notebook from GitHub and run it in VSCode or Jupyter. In that case, install all the packages required by running:
pip install -r https://raw.githubusercontent.com/daviddavo/pocket2omnivore/main/requirements.txt
After running the second cell, It will ask you to upload the ril_export.html file. And then to enter your omnivore API key in the next one. Just paste the API key you obtained in the previous step into the prompt and press ENTER. The text that prompts for the API key can be pretty small, but the notebook won’t continue running until you press ENTER.
If you know any programming, you can also change the
OMNIVORE_API_KEYenvironment variable.
Continuing
After running all the remaining cells, it will start uploading the URLs one by one. It will take a while. If you visit Omnivore, you’ll see that some of these posts don’t have a title or a description. This is because it takes a while to crawl the website.
If it raises a 403 error, the most probable thing is that you entered your API key wrong, or that it expired. Feel free to comment any errors you encounter below or in GitHub Issues.
By the way, did you know that this page is intended to be fully compatible with Omnivore? Try adding some of my posts to your list!